Badges that categorize players automatically are not allowed to be used during live play on PokerStars and full tilt poker. They will still appear on the replayer and when viewing note history within NoteCaddy. Please see new PokerStars software rules. Please email any questions to support@pokerstars.com. Badges that are assigned manually by you are currently working on PokerStars. Add the stat NC.PlayerTags to your HUD to be able to tag players manually. Any image file in c:\usersmy_windows_loginappdata\Roaming\HoldemManager\NoteCaddyBadges can be set as a player tagWhen playing multiple tables, it can be difficult to read a player's notes quickly and effectively without slowing down the action too much. The purpose of NoteCaddy badges is to display an image directly in a player's HUD when a very important note has been taken. This way, a NoteCaddy user can be alerted to his enemies' most important idiosyncrasies without having to hover over a note icon or stat.
The view of a HUD and popup where badges are configured
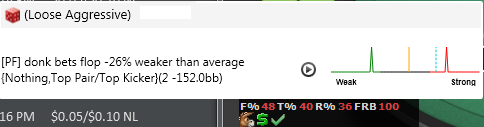
It is recommended that badges be used for notes that differentiate a player from average. The popup in the image above describes why this player got the donkey badge. It is because he has shown weak hands when donk betting. A badge can be created for anything a NoteCaddy user wishes to know quickly.
How to represent a note with a badge
There are two ways to make a note appear as a badge. The first is to select a badge in the definition editor on the general screen.
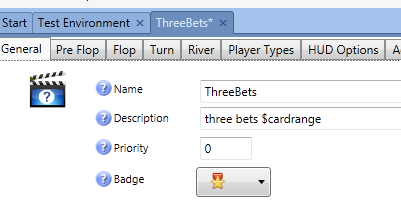
A definition with a badge image selected
If you select the same badge image for multiple definitions, then the badge will appear as long as one of the definitions is valid for a player. Valid meaning that all the conditions including sample and success filters are met. If more than one of the definitions are valid, the image will still only appear once but hovering over the image will show all the valid notes.
You can use images for badges that are not listed as part of the defaults. Any image used for a badge must be exactly 16x16 pixels and either png or gif
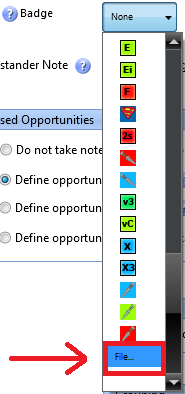
Just navigate to where it says "file..." and pick any valid file from your computer.
The second way to add a badge is through a color definition. This gives the advantage of being potentially easier. If you know some HM2 stats that you want to filter by, you don't need to make NoteCaddy note definitions for them. You can just filter by ranges in the color definition editor. If you want to filter by more than one statistic or NoteCaddy note, then using a color definition is the only way to do it.
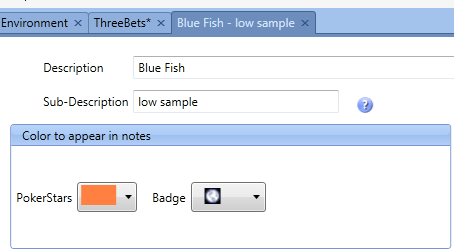
A color definition with a badge image selected
If you filter by, for example, VPIP and PFR in the color definition editor, then both need to be correct. This means that color definitions filter using AND logic instead of the OR logic that note definitions produce.
The following article gives a detailed description of the default badge definitions and how to create your own
NoteCaddy BadgesAdding Badges to Your HUD
Badges are added to your HUD via HEM's HUD options
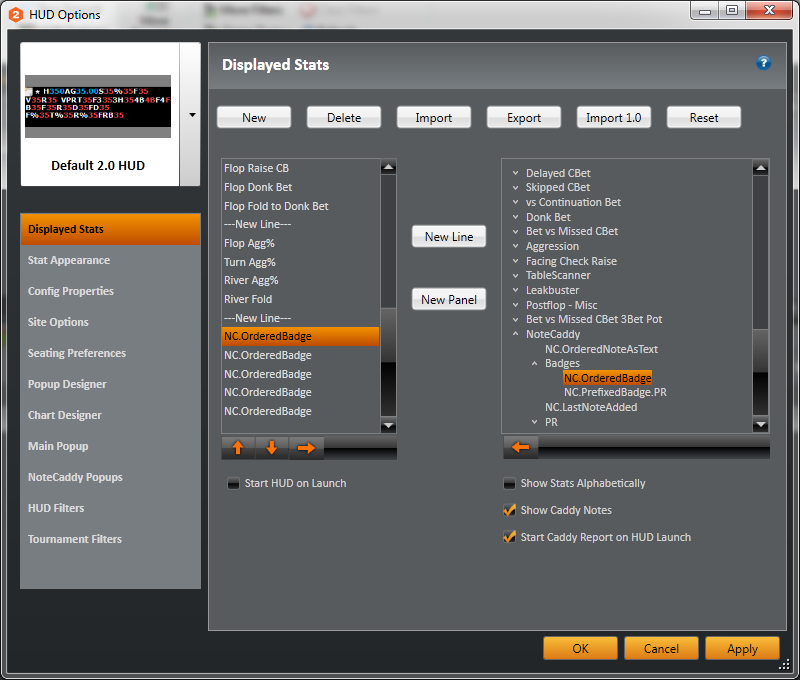
Keep in mind that the amount of badges shown in your HUD is limited to the amount of times you add that badge stat. In the above screenshot you see NC.OrderedBadge 5 times. This means if a player has 6 badges, one will be cut off. The stat NC.OrderedBadge will show the badges regardless of the prefix. If you want to make, for example, separate rows for pre flop, flop etc, then you would add them as NC.PrefixedBadge.PF and NC.PrefixedBadge.F. This is typically for advanced users who make a large number of customized badges though.
Each badge will show up a maximum of one time. If you use NC.OrderedBadge and NC.PrefixedBadge, the badge will appear for the first relevant slot.
By default, badges will scale with the HM2 HUD. That means if you make tables smaller they will get smaller and if you make tables bigger they will get bigger. You can force badges to always show at their normal size by going to file->settings->HUD and unchecking "scale badges in HM2 HUD"
Discovering which badges you should expect to see
You can see which of your note definitions will produce badges quite easily. Just add the "Badge" column via the
column chooser. Your definition list will now look similar to the following:
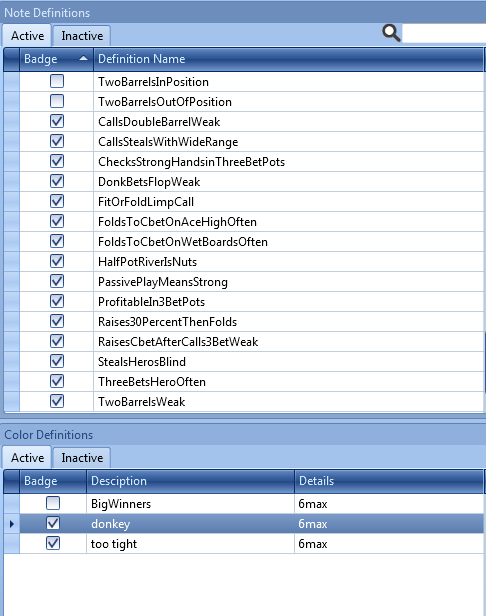 Keep in mind that none of the default color definitions produce badges
. However, most
coaching packs do use them as they provide some more flexibility.
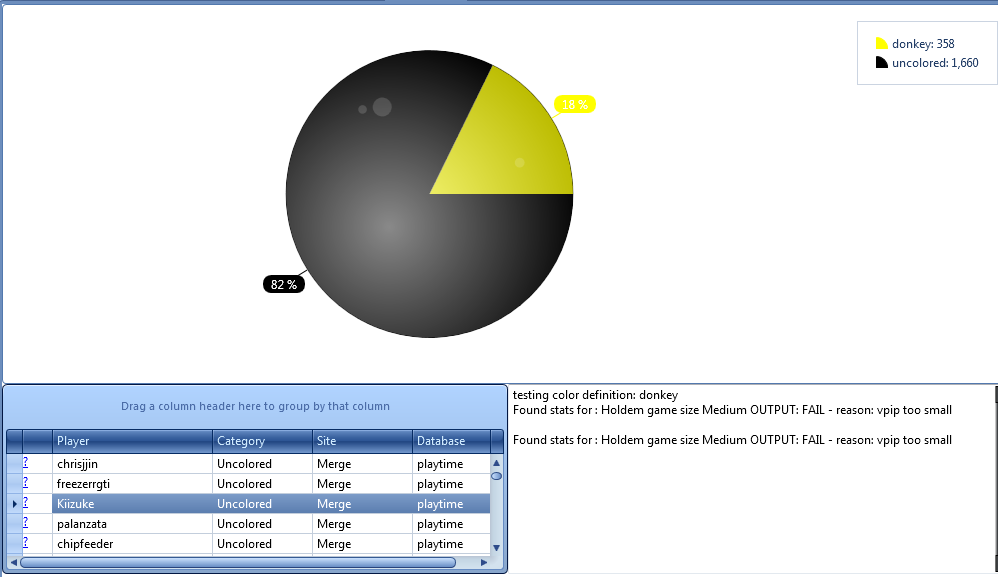
For note definitions, just right click any definition and click "analyze". This will take you to the
analysis screen. There is a tab named "recipients". Opening this tab will show you a list of all the players in your database. For each player there is a column titled "appears?" that shows if the player will get the badge or not.

Whenever "appears?" is unselected, there will be a reason provided. You may notice that the default badges will have relatively few recipients. This is because their purpose is to highlight players who stand out significantly from other players. You can make these requirements less stringent by double clicking the definition in the listing and opening the
advanced tab. Here you can change values like the amount of spark points, instances, deviations from average so that more players receive the badge.
For color definitions, you right click and then click "seek". The report that appears will show you all the players in your database as well as what percentage will see the badge. You can click the question mark next to players' names to see the explanation of why they wouldn't receive the badge.